Overview
Auto-Enrollment simplifies and expedites the process of assigning a single, or collection of, assignments to any given learner. Instead of manually loading or importing learners into their respective assignments, you can create URL and QR code that directs learners to a curriculum so they can click-to-enroll themselves. Once you create a URL/QR code combo for your curriculum, it can be delivered to an unlimited number of learners over an indefinite time period (or until you choose to deactivate it).
- Accessing the Auto-Enrollment UI
- Setting up Auto-Enrollment
- Enabling & Using Auto-Enrollment
Accessing the Auto-Enrollment UI
To access Auto-Enrollments, open the [Users] interface via the Quick Links at the bottom of any learning program screen.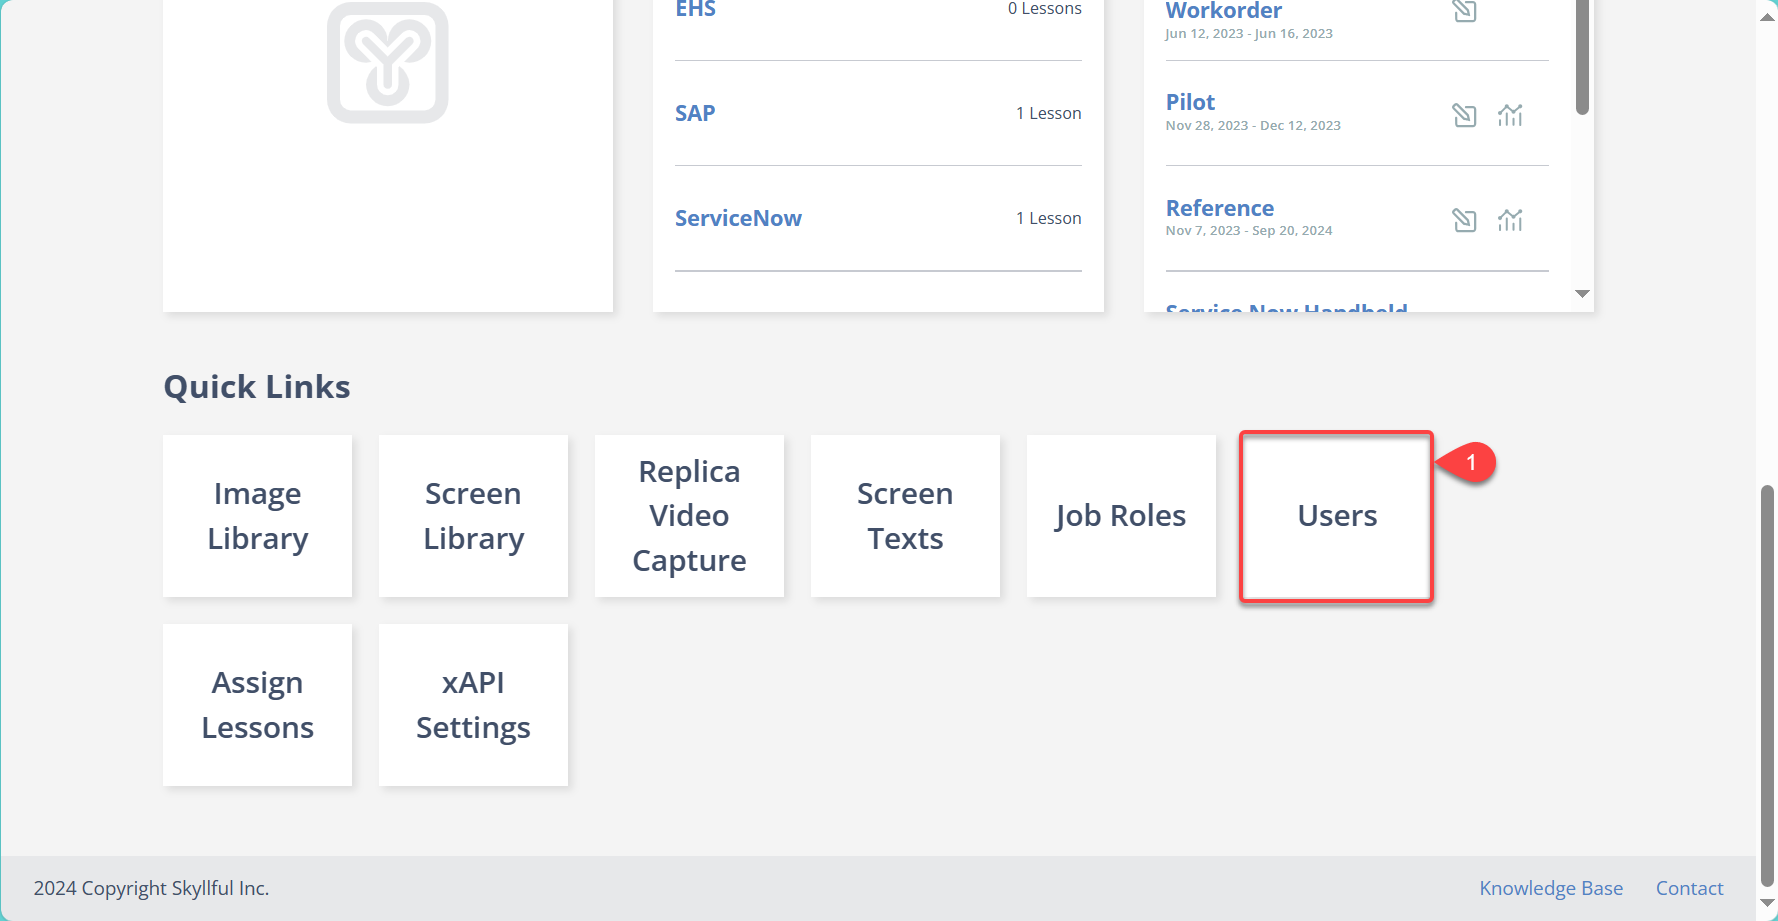
Click [Auto-Enrollment Links].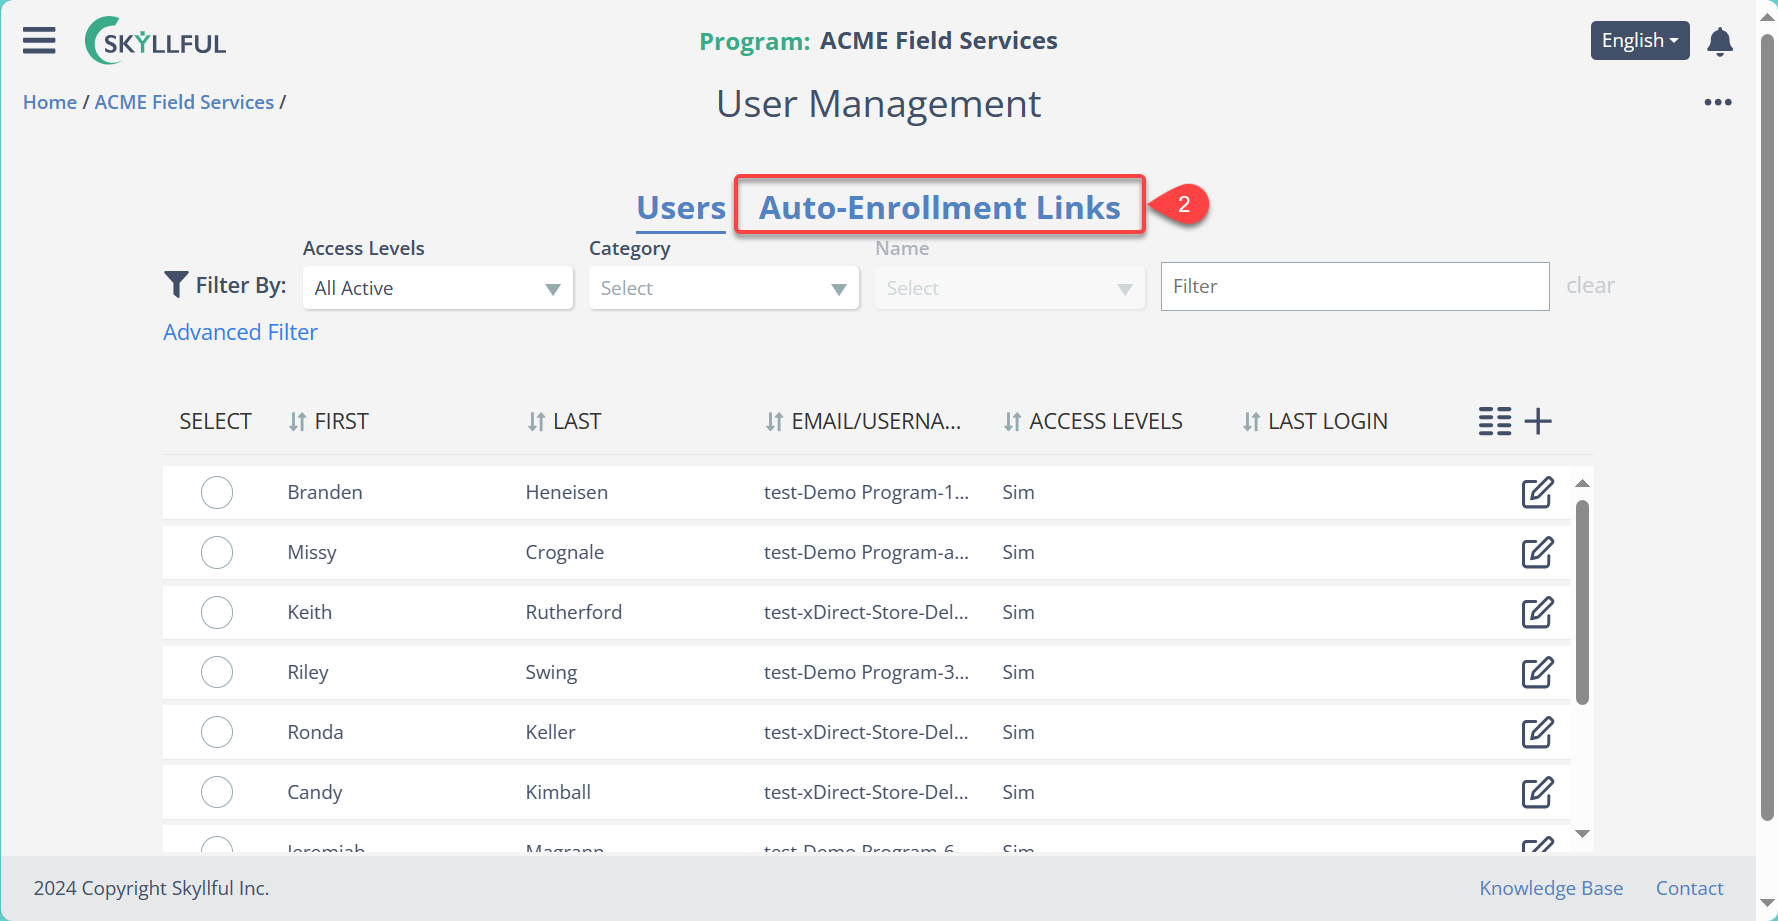
To create your first auto-enrollment, use the [+] icon.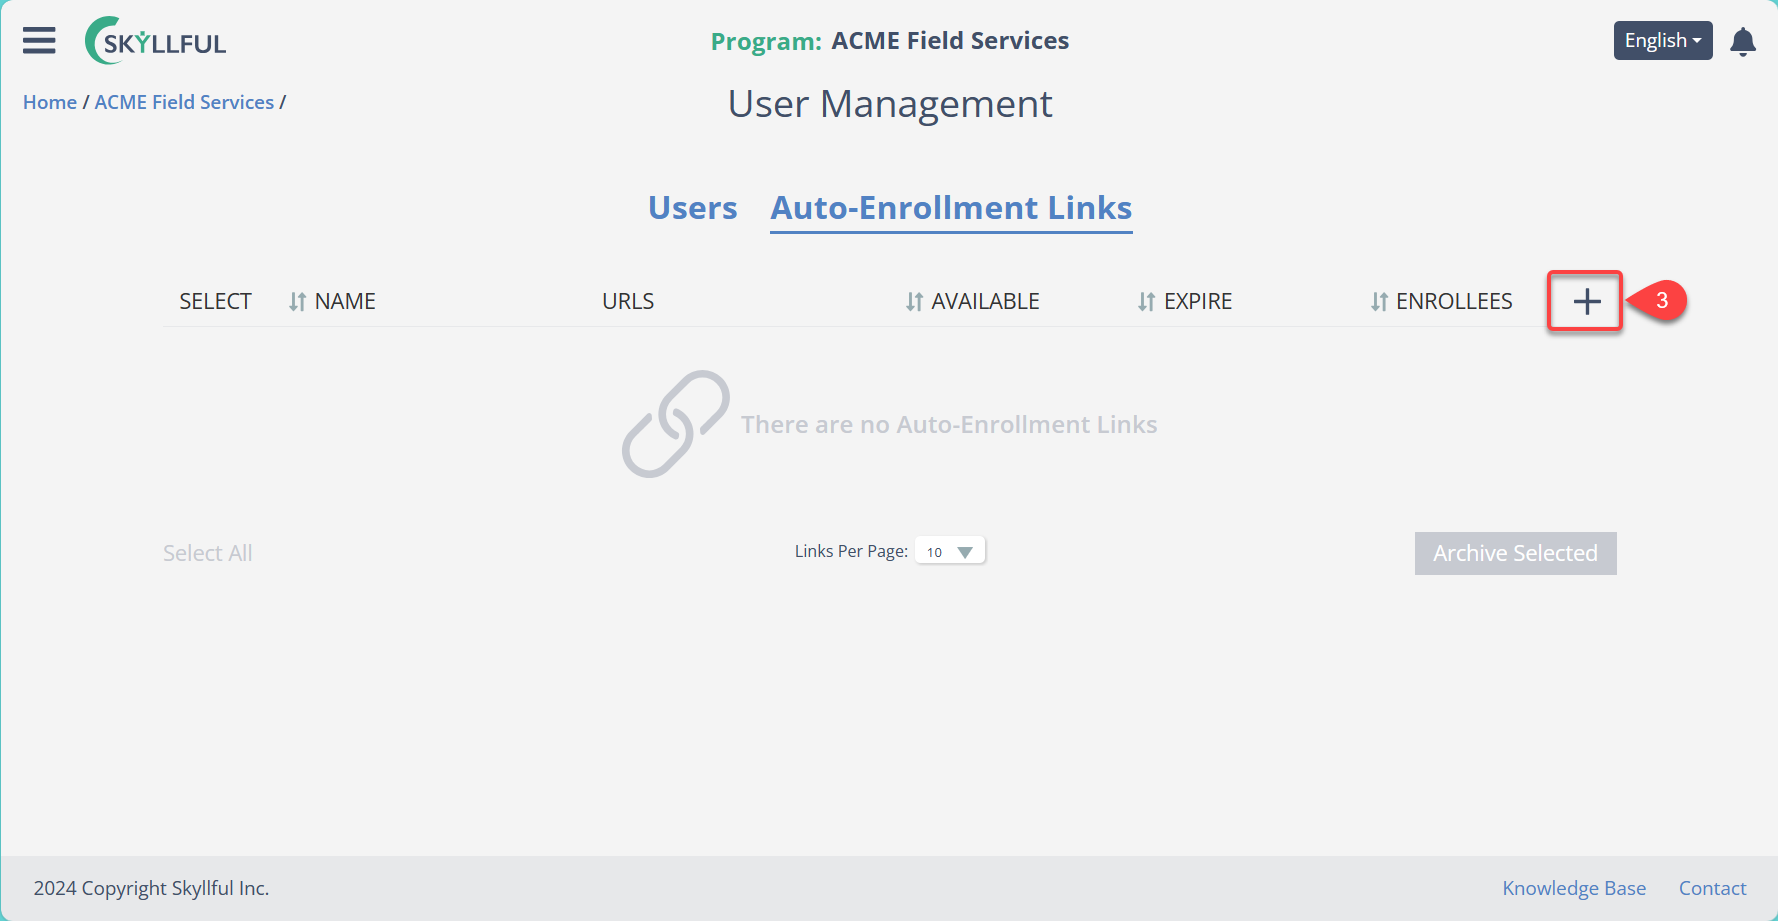
Setting Up Auto-Enrollment
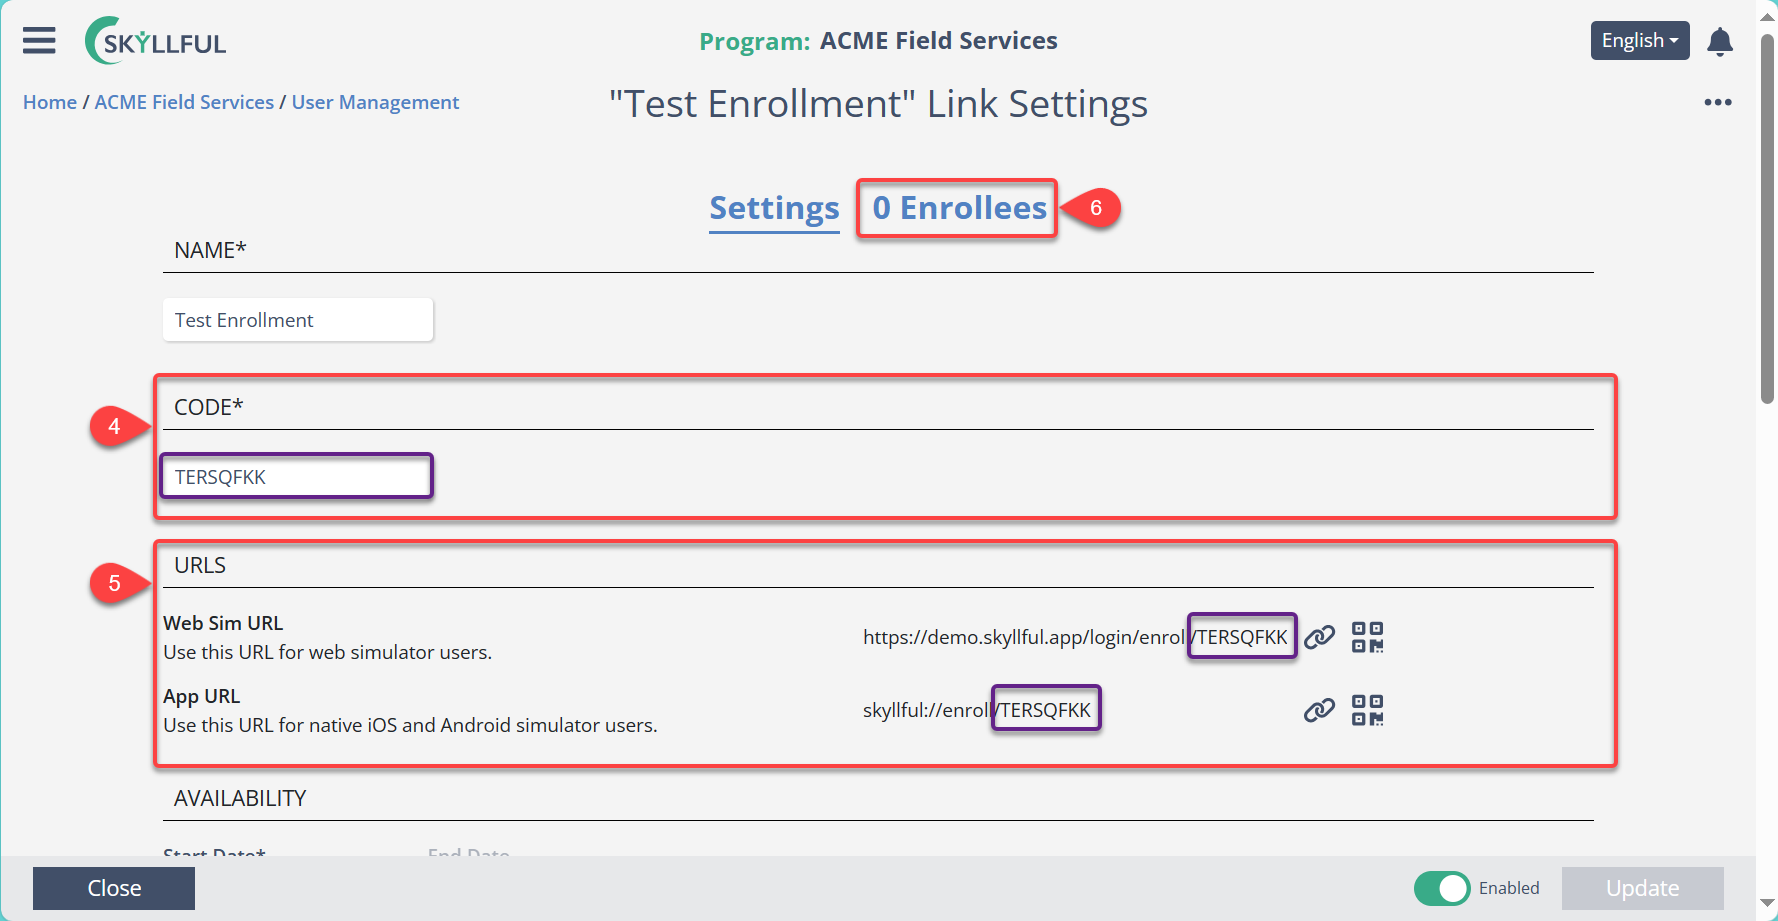
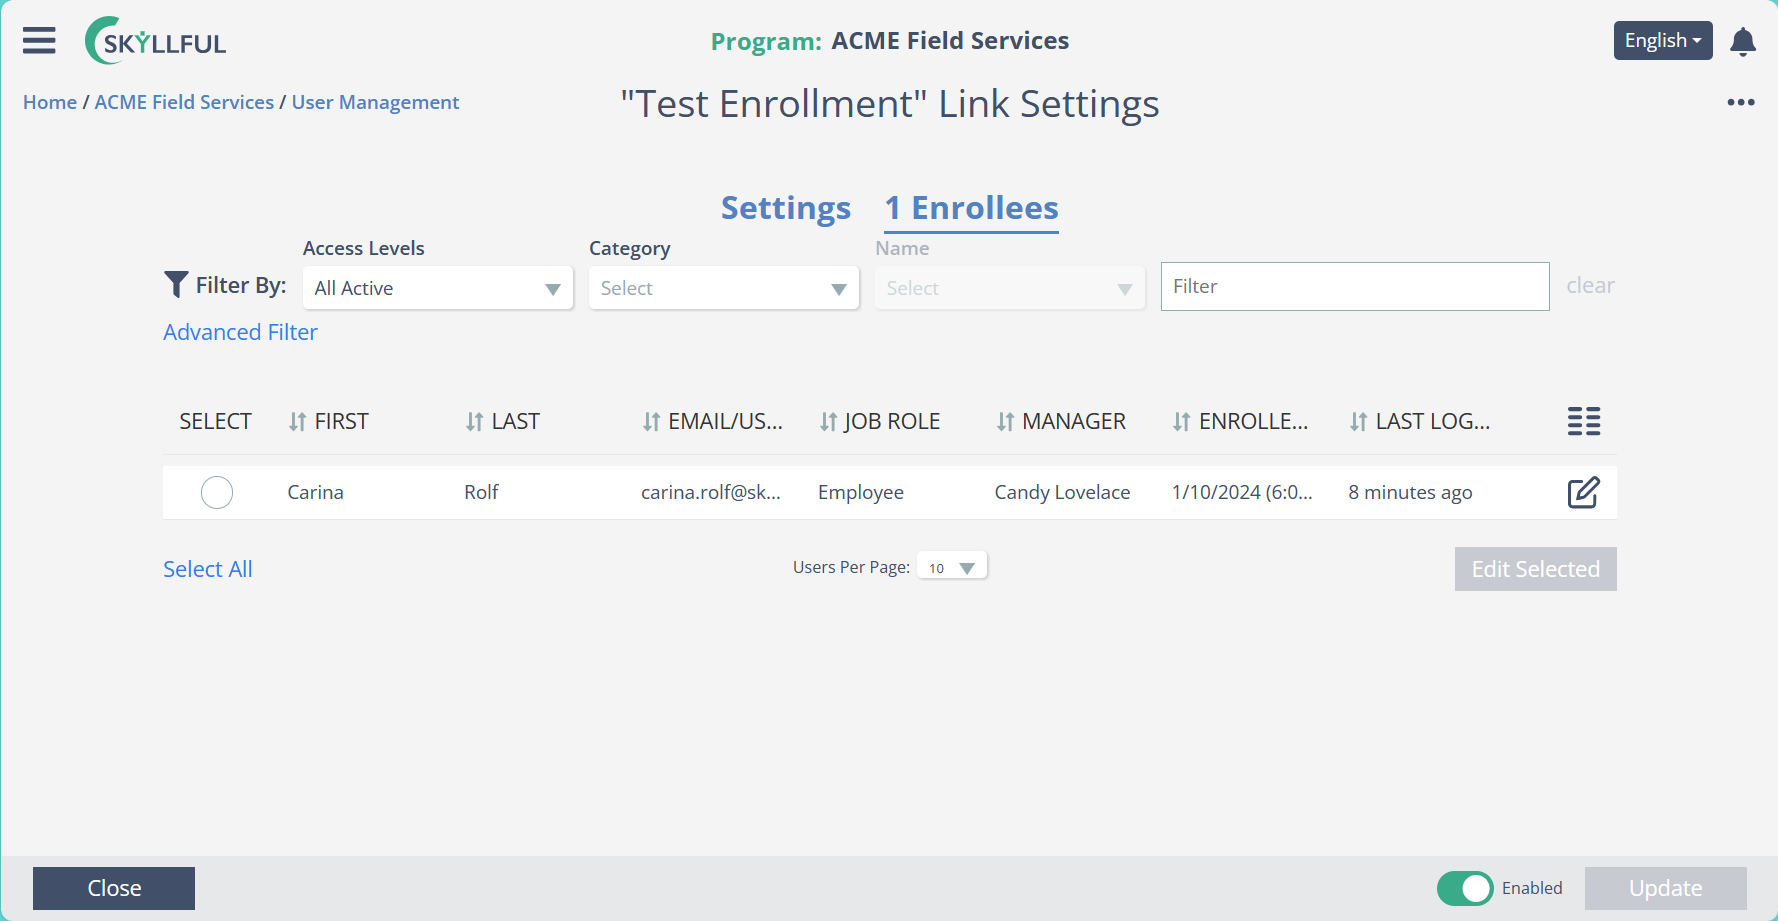
Auto-Enrollment consists of a group of components. There are 2 interfaces: (1) Settings - as seen below, and (2) Enrollees - which displays a list of learners who have self-enrolled using the URL or QR code. In the example below, the Enrollees interface is inactive because this auto-enrollment is in draft form.
There are 3 primary components to setting up an auto-enrollment:ENROLLMENT PARAMETERS (red)The name and availability dates for this enrollment LEARNER PROFILE DATA (purple)Data that may be added to, or alter, a learner's profile when they use the link/QR code to access the assigned curriculum ASSIGNMENTS (green)An enrollment can include 1, or more, assignments 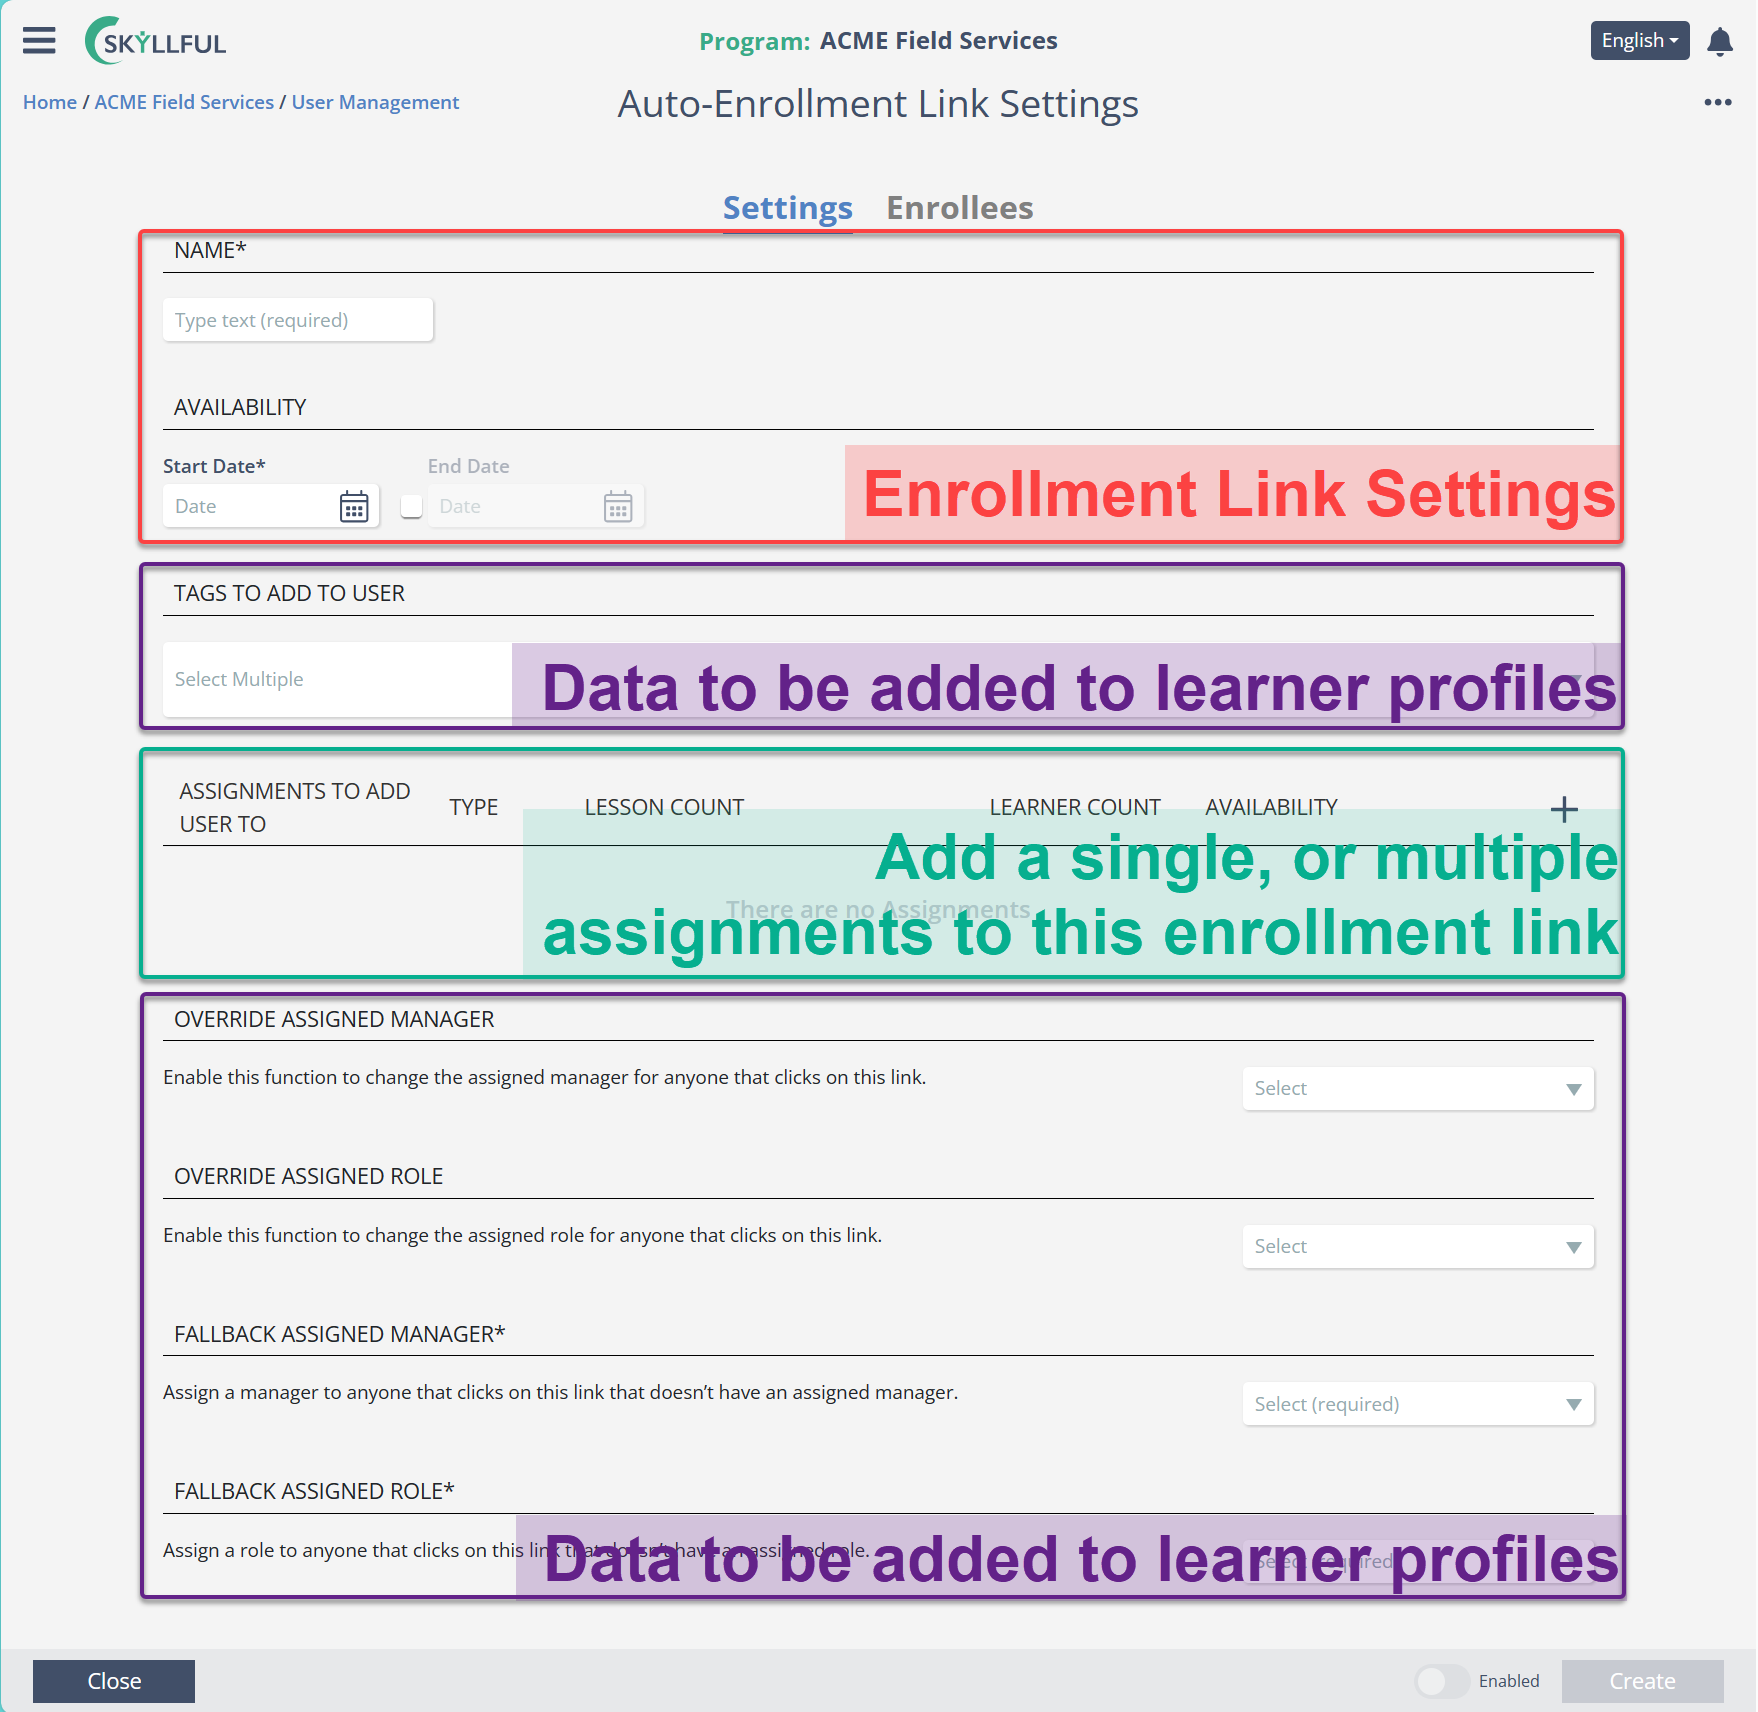
ENROLLMENT PARAMETERS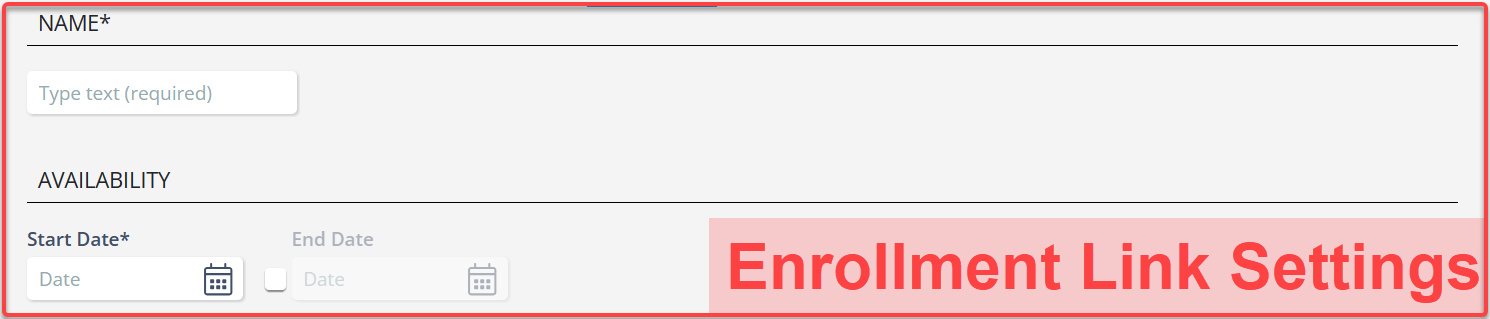
NAMEThis is an identifier for the enrollment link/QR code. It should be something that helps you identify this assignment/group of assignments and the learners who are intended to be enrolled. AVAILABLITYThe start date represents the go-live date for the enrollment link/QR code. To create an end date, you need to check the box and set a date. Otherwise, the enrollment will work indefinitely (or until you make a change to this setting).
LEARNER PROFILE DATA
TAGSTags are optional and can be added to any user who auto-enrolls in a curriculum set. There are no limits to how you use your tags, or how many tags you add to someone's profile. *Reminder, if you return to the settings and alter tags, or any other field, in the future - changes will not be retroactive. 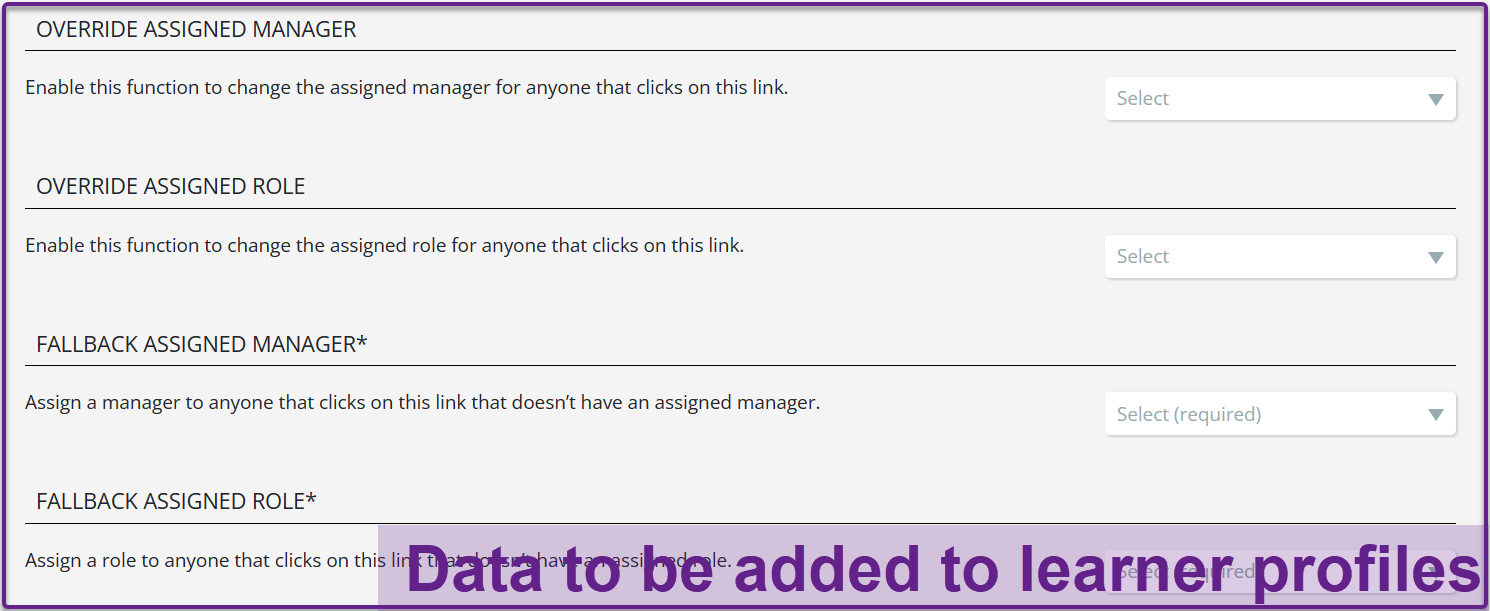
FALLBACKS (mandatory)If a user is already in the system when they use an auto-enrollment link to access curriculum, the fallback data will populate their profile's manager and role fields if either is empty. Fallback assignments are mandatory because manager and role fields are a requirement of learner profiles.
Fallbacks are a safety net for fringe cases where someone who is already loaded into Skyllful (perhaps as an administrator) auto-enrolls into a curriculum and needs a manager or role assigned to complete their learner profile. OVERRIDES (optional)if a user is already in the system when they use an auto-enrollment link, the override provides administrators the option to program a change of manager or role. This feature could help with training program maintenance as employees promote or change roles.
Example: if a driver becomes a supervisor, you could override the role for anyone who auto-enrolls through the supervisor training to have a role change to 'crew supervisor'. Note: this will not reflect in your personnel management system; it only impacts the learner's Skyllful profile.
Fallbacks are a safety net for fringe cases where someone who is already loaded into Skyllful (perhaps as an administrator) auto-enrolls into a curriculum and needs a manager or role assigned to complete their learner profile.
Example: if a driver becomes a supervisor, you could override the role for anyone who auto-enrolls through the supervisor training to have a role change to 'crew supervisor'. Note: this will not reflect in your personnel management system; it only impacts the learner's Skyllful profile.
ASSIGNMENTS
You can create a URL/QR auto-enrollment for a single assignment, or for an entire curriculum set. To add each assignment to the enrollment, simply tap the [+] icon in the upper right.

Launching & Using Auto-Enrollment
Once you have completed the auto-enrollment setup form, click [Update] to save your enrollment and then activate the [Enabled] toggle.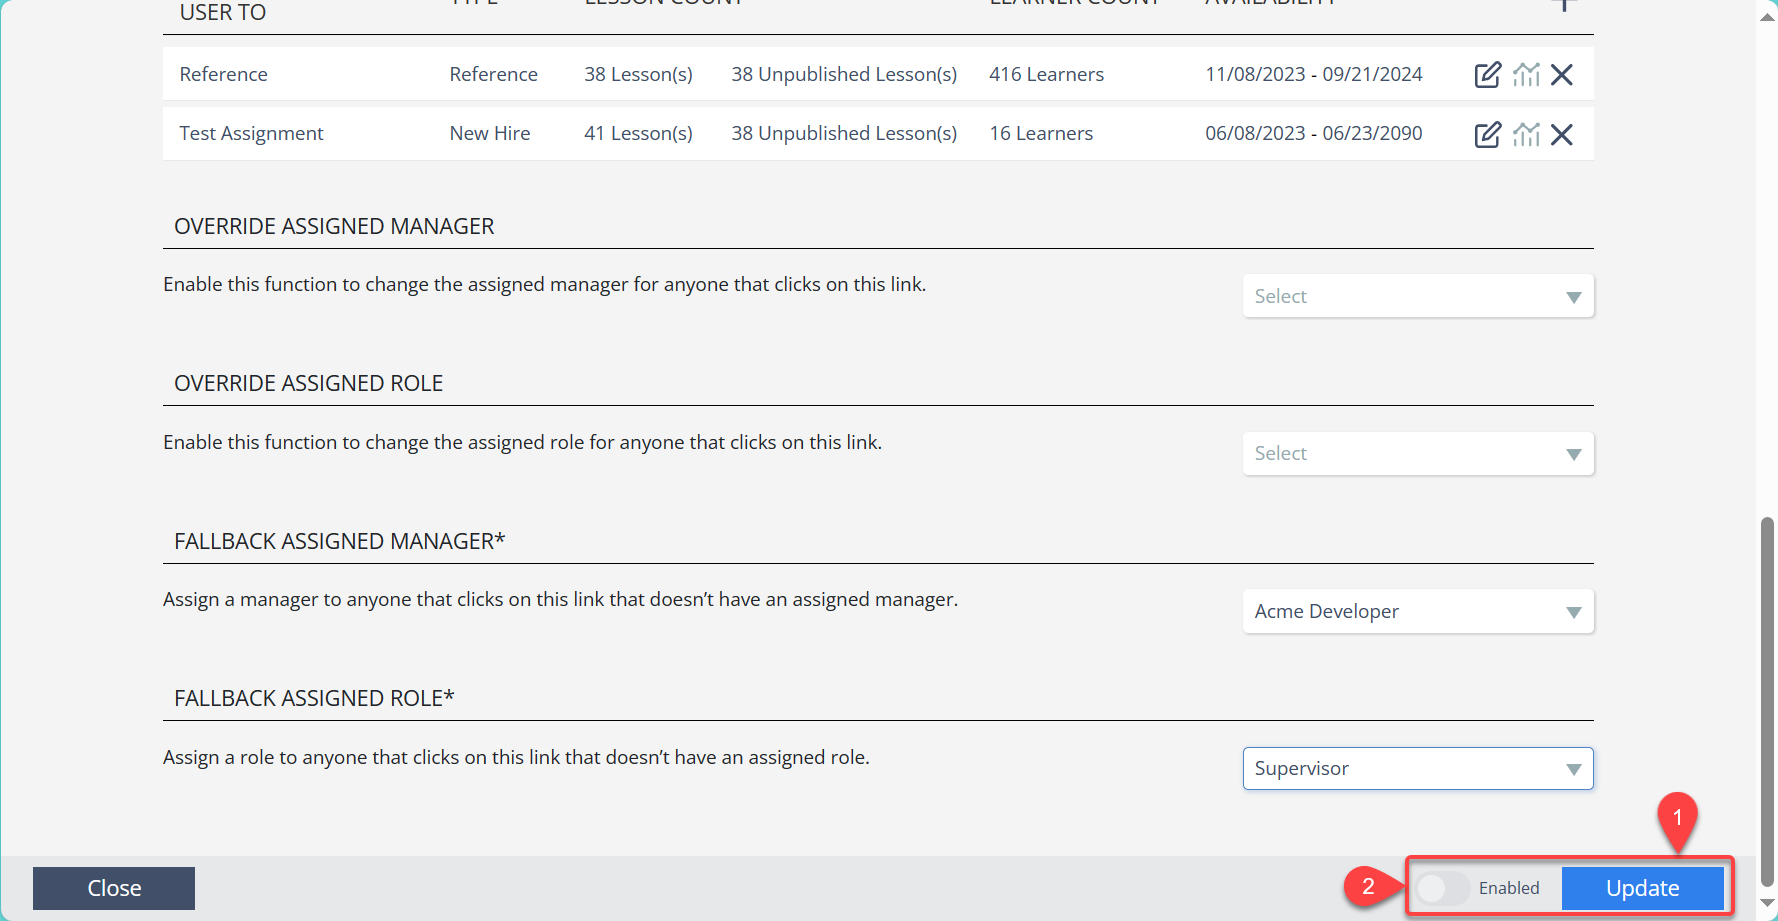
If you scroll back to the top, you will see 2 new sections containing a code and URL/QR codes for both web access and application-based learners.CODE
The code is generated upon enrollment creation, but can be customized. Notice the code is the identifier at the end of the URL.
The code is generated upon enrollment creation, but can be customized. Notice the code is the identifier at the end of the URL.